Saturday, May 14, 2011

The weekend snacks: Gyoza

I've been having this hankering for some sort of dumpling (wantons, sui gows or gyozas) for quite a while now. So today while I was out grocery shopping, I picked up some items for making some gyoza!

Thing is, I've never made these before so I was a bit nervous about how they would turn out.

Anyways, here's the ingredient list....
  • 1 tbsp light soy sauce
  • 1 tsp sesame oil
  • 1 tsp corn flour
  • 1 tbsp ginger, grated
  • 1 clove garlic, minced
  • 1 cup cabbage, finely shredded
  • 350g minced pork


The main marinade ingredients - soy sauce, sesame oil, corn flour, garlic and ginger.

Mix them all up. You'll get a weird looking but wonderful smelling mixture!


Add in 1 cup of shredded cabbage. This helps give the gyoza a bit of a crunch and makes it less meaty. In some other variations, a little bit of chives are added in. Or for the Chinese version, chopped water chestnuts are added.


Add the minced pork in and mix well. You can try using other types of mince but pork really works the best.


The recipe didn't call to let it sit and marinade, but I decided, 10 mins in the fridge can probably help the mixture really soak everything up. I'm a strong believer in marinading :)


I couldn't find any gyoza skins so I bought wanton skins instead. They're kind of similar but these are a little thicker, and they're square instead...

Tip!
If you like, you could get a cookie cutter or a bowl, place it over the wanton skin and cut off a nice circle to make it look more gyoza-y. I was just too lazy :P


Lay them out on a flat and dry surface. The skins are already dusted in flour so you don't have to dust the surface.


Place about a teaspoonful of the filling mixture onto the skin. Try to place it as much to the middle as you can.

This is the part where you need to be practical :) something I've learnt from personal experience. Don't put too much filling in because it will be hard to pleat the sides and trust me, an overfilled gyoza does not taste good!


Use a brush (or your fingers) to brush a little bit of water towards the top and half of either side of the skin. Don't put too much water because it softens the skin almost immediately and makes it really hard to handle.


Fold it upwards and fold some pleats to hold the filling in. Now this is the tricky part. It really does take some time and practice to get this done nicely and neatly.

If you've made a whole bunch, lay them flat and pop 'em into the fridge to freeze. Once they're fully frozen, you can put them in zip lock bag. Cook them the same way you'd do with fresh ones, they don't really need to be thawed out!


Heat up the pan with a little oil on medium.


Give it about a minute or two, then place the gyozas on them. Don't flip them over. You only want one side to have that nice brown crispy skin.


Pick on up to see the underside. If it's nice and brown, that means its ready for steaming!


Pour in about 1/3" of water into the pan. I used hot water here so that it wouldn't take them too long. Make sure you don't pour too much water though... because the gyoza will become soggy.

Note
Remember it's a hot pan with fried gyozas on it, so when you pour water in, there'll be this huge billow of steam. So watch out when you do this.


Cover the pan so that the water gets a chance to boil properly. This is so that the gyozas get to steam properly and absorb the water. Check after a minute to see if the water's all soaked up. If they are, gently remove them from the pan.


Plate up and serve! You can eat them as they are, or get some dip (vinegar, soy, ginger slices, chilli oil) to go with it.

Saturday, May 7, 2011

Lemon and parsley lamb chops


If there's one thing that the pup and I can't get enough of... it's lamb! Well... actually that comes in a very close tie with bacon...

Anyways, instead of the usual grilled lamb chops with mint sauce, we tried something new.

I forgot to take pictures of the ingredients :P so here's the list

For the marinade
  • 2 tsps finely grated lemon rind
  • 1 tbsp lemon juice
  • 2 tbsps chopped fresh flat-leaf parsley leaves
  • 2 tbsps olive oil
  • 4 (200g) forequarter lamb chops
For the potatoes
  • 600g nadine potatoes
  • 30g butter
  • 2 green onions (also known as scallions or spring onions in this part of the world)
I find using zip lock bags amazingly convenient and simple. For these, I'll just get the house brand ones because they're so much cheaper, and I only use them once!

Anyways, chop the flat leaf parsley and put it in the bag.

Tip!
I've tried this with Chinese parsley because I couldn't find Italian flat leaf parsley at the supermarket. Got a slightly different flavor but still rocked the marinade!

Grate the lemon and put that in as well...

Squeeze 2 tbsps lemon juice in and add 2 tbsps olive oil as well. Mix it well before putting the meat in.

Add the meat in and rub the marinade around it. The recipe calls for four pieces of meat but I'm only using two for this serving.

Put it in the fridge and let it marinade. Recipe calls for two hours.

Tip!
If you can, try to flip the pieces of meat around after an hour to get an even marinade!


After two hours, heat up some olive oil in a pan. Keep it on medium-high heat.

Tip!
Try not to use a griddle pan for this. Although it gives the meat nice char marks while grilling but it also dries it up faster. A frying pan helps to cook it with the oil and its juices.


Remember to remove most of the solids from the marinade because the extra leaves and grated lemon rind will burn a lot faster than the meat. You can leave a bit on while grilling.

Grill each side for about four mins or so. But please go with your instincts as well. If you feel that it's got enough time on the grill then just flip it :)

When both sides are grilled, remove from pan and work on the other piece.


Peel and cut the potatoes in to little chunks. Heat up a pot of water with a bit of salt and put them when the water starts to boil. You'll know when the potatoes are done if you can poke a fork through easily.

While waiting for the potatoes to be ready, chop up some green onions into teeny pieces. You can use less if you're not a big fan of them.


When the potatoes are done, drain properly. Then add in the butter and green onions.

Add a dash of ground pepper too. It really helps to bring the flavor in! Then simply stir it up gently. Don't be too rough or vigorous because then you'll make the potatoes in to mash.

Don't worry, you WILL end up mashing a teensy bit of it. WHen it's done, take a quick taste. Add salt or more pepper if needed.

When all of that is done, you're ready to plate up! Place the lamb on a bed of potatoes and voila.... dinner is served.

Let me know if you do try this... I'd love to hear your comments.

Happy cooking!

xxx
Bunny

Thursday, April 21, 2011

The weekend meals: Cold Chicken Pasta

In my last post, I showed how to make a cold pasta salad with tuna... this time I decided to use chicken instead. It requires a bit more work - marinade, grilling, and chopping but I assure you, it's well worth it!


Ingredients are very similar to the previous recipe. Feel free to add or omit any veggies that you prefer.

  • 3 sticks of celery
  • half a red bell pepper
  • 1 green bell pepper
  • 1 carrot
  • 1 kyuri (Japanese cucumber)
  • 1 chicken breast
  • about 3 handfuls of pasta
  • olive oil
  • salt & pepper (to taste)
For the marinade
  • Soy sauce
  • Pepper

Slice all the veggies up and dunk them in a bowl of water and put it in the fridge. I usually slice them to about the same width and length. Oh and I put it in the fridge because it helps to keep the veggies fresh and crunchy while I do the rest of the stuff.


Slice the chicken breast into strips and pour some pepper in. Now here's a bit of the problem, I can't tell you exactly how much to put because I did it by some sort of instinct. So I'm going to say roughly about 4-5 shakes of pepper....


And about 4-5 glugs of soy sauce.


Mix it up. IF the marinade looks a little dry, add a bit more soy sauce. Let it sit for at least 10-15 minutes so that the chicken actually gets the chance to absorb the marinade properly.

If you've got the time to spare, let it sit in the fridge for an hour or so.


Heat up the griddle pan on medium heat with some olive oil. You can also use a regular frying pan but you won't get the nice char marks or the caramelized sauce. Well not as much as from a griddle pan.


Try to place the marinated chicken breast strips as neatly as you can across the griddle.

Note: use whatever utensil you're more familiar with. In my case, it's just the Asian-ness that makes chopsticks a much easier utensil than a pair of tongs or spatula.

Let it cook until you see the sides of them lose their opacity and turn into a more solid almost white color. Then you can start flipping them over to cook on the other side. Once that's done, take them off the griddle onto a plate and let them cool. I usually just shove them in the fridge.


While you're waiting for the chicken to be done, start cooking the pasta. I always add a dash of salt and a small glug of olive oil in. The salt gives it a bit of flavor and the oil makes sure that it doesn't stick. For some other recipes, I like putting a bay leaf in.

Once the pasta is done, drain properly and cool them by running them under some tap water. This will prevent it from cooking any further.

I also put this in the fridge to keep them cool. It is after all a cold chicken pasta....

After an hour or so, take everything out (veggies, pasta and chicken) and give 'em all a nice dicing.... except for the pasta...


Place in a bigger bowl and combine slowly. If you are a tad rough or too fast, the pasta will break and you'll just end up with bits and pieces of them...


Add a little salt and pepper to taste while mixing to get the right taste. If it's not salty enough, don't worry, the chicken will release its flavors after a bit so go easy on the salt.


There you go!

Easy peasy innit?

Happy cooking!

xxx
Bunny

Sunday, April 17, 2011

The weekend meals: Cold Tuna Pasta

While spring-cleaning the kitchen pantry this weekend, I found a can of tuna and thought it would be quite a waste not to use it and also "Hmmm what can I make with this?" because Puppy doesn't like fish as much... as I do (duh).

Since we do have quite a bit of raw veggies stocked up, I was looking for a no-cook, no-brainer kind of food, I decided to make cold tuna pasta salad. This recipe is inspired from here, of course as usual, I modified it (to what I have in the kitchen and to my taste).

Since it's a cold (and can be warmed up) salad, not only is it a tasty snack, it's a great dish to make to bring to work as a healthy lunch too!

Ingredients are:-
  • 6 cherry tomatoes
  • 2-3 sticks of celery
  • 1 carrot
  • 1/4 green bell pepper
  • 1 can of tuna
  • Juice from half a lemon
  • About 3 hands full of pasta
  • Salt & Pepper to taste
  • 1/2 cup of plain yoghurt (the one I have here in the pic is 135g so it's about 60g or so?)

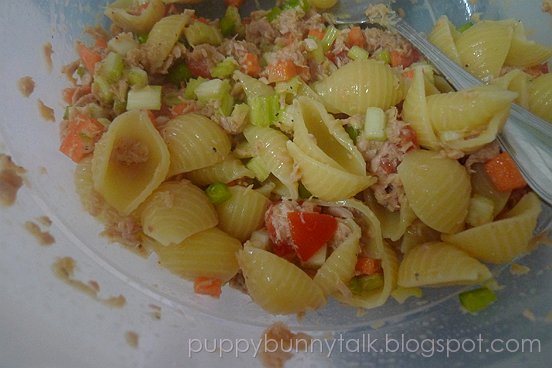
Dice the cherry tomatoes, celery, carrot and bell pepper into cute little squares. Pop in the canned tuna - make sure you drain it properly though because the oil can make the dish a bit fishy. If you don't mind it by all means pour the whole can in! :)

Mix it up well and make sure you mash the tuna chunks up.

Squeeze in the juice of half a lemon. This helps to make it less fishy and gives it a nice tangy fresh taste!

While you're at it, boil a pot of water for the pasta. Add a small dash of olive oil and about 2 pinches of salt to it and follow the directions to cook the pasta.

I like using freshly ground black pepper. It really tastes better. This one from McCormick is pretty good but isn't refillable... still looking out for a good pepper and salt mill... If you do know of any, do drop me a note :)

Add some salt in. Don't pour in a lot. Sprinkle a little in, stir it up and taste. You don't want to end up with a super salty dish! Oh and it's better to use fine salt for this. I usually use chunky sea salt bits but since this is almost a no cook dish, you'll end up with salty chunks hidden somewhere in your salad and trust me... it's NOT a good surprise.


By the time you're done taste testing, your pasta should be pretty much done. Mine takes 10 mins to cook. When it's done, drain it and pour in into the tuna mix.

For most dishes like these, I like to use pastas like shells or spirals because then the yummy mix gets trapped in the pasta :P

Mix it well. I like to mix it while it's fresh off the stove because then the heat from the pasta kinda cooks the tuna mix a bit.

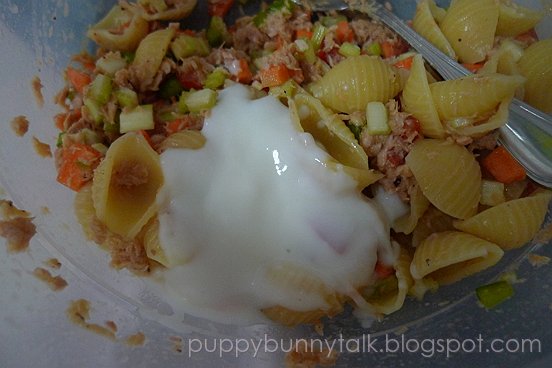
I used the spoon from the yoghurt cup and put in about 5 spoonfuls. That's roughly half a cup of yoghurt there. Most other recipes I saw online called for mayo instead but since I didn't have any mayo and thought that I should eat more healthy, I opted for yoghurt instead.

Mix well. You can add some more salt and pepper if you need.

p/s: Yeah I know the yoghurt looks kinda disgusting here :P

Pack it up into a container, seal tight and chuck in the fridge to cool!

It's as easy as that!

Happy cooking :)

xxx
Bunny